Description
IN STOCK AGAIN, CHECK IT OUT! Also available the bare pcb board in graphite semi-matte color. Other colors are discontinued, please do not ask it. Thanks.
—
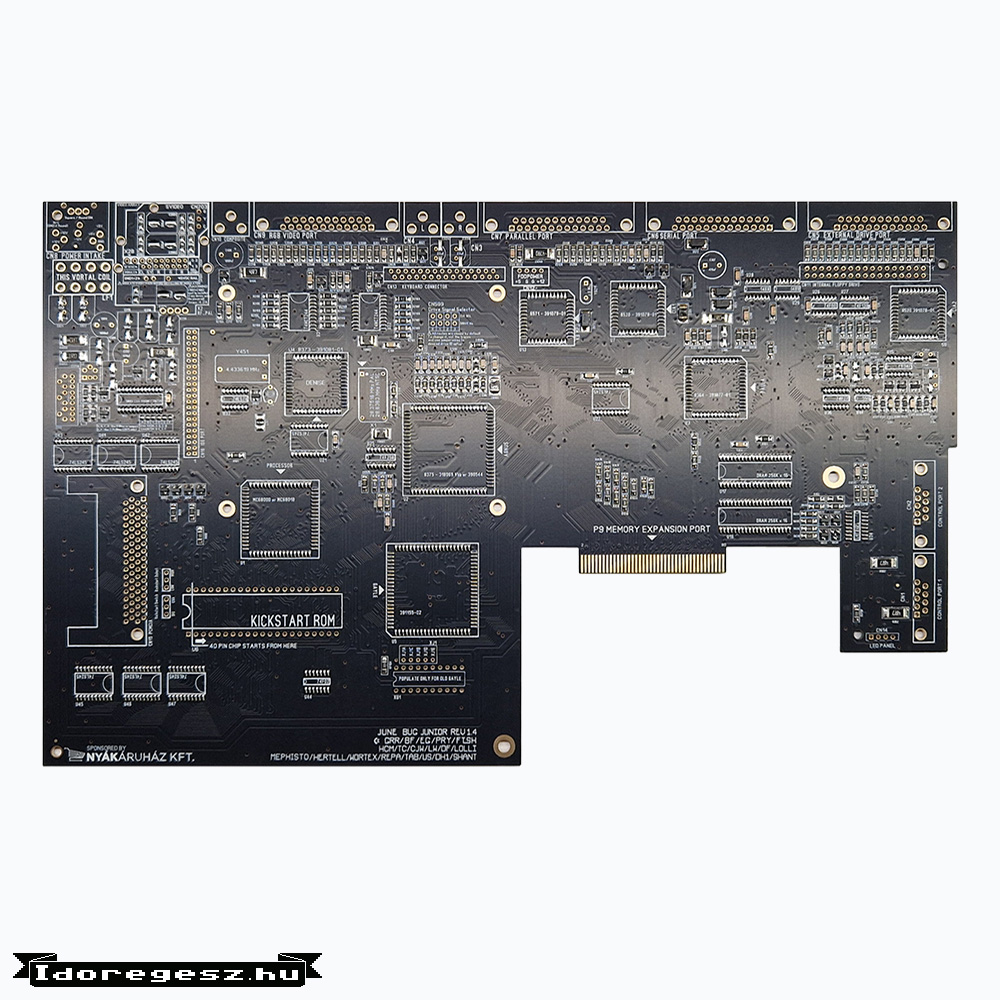
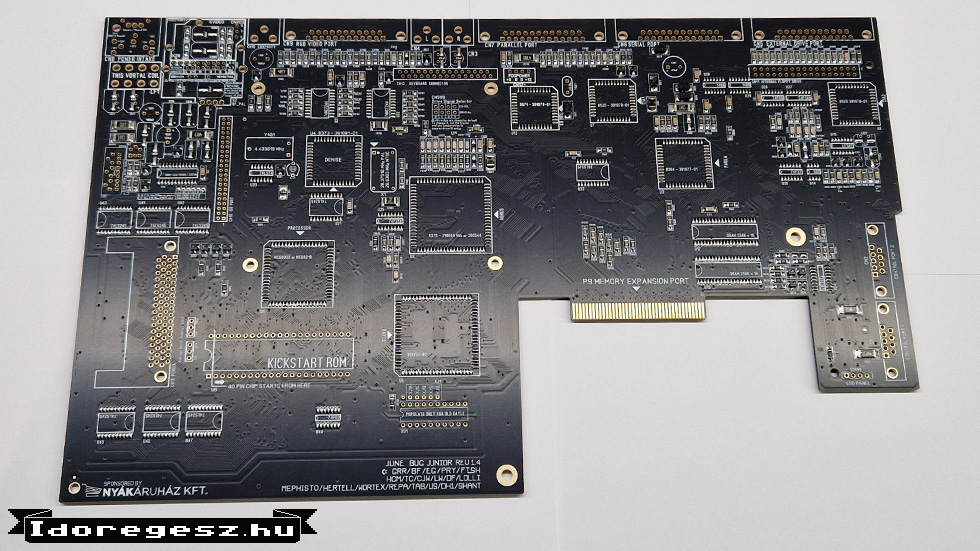
Amiga 600 Junior made by Róbert Tihanyi in 2022. Here is the June Bug Junior final progress update (juniordescription) from the ‘big amiga group’:
I also take the opportunity to detail the board again. i tried to made re-searchable by work “juniordescription” if future questions arises.
What is Junior?
It is a replacement board solution for the Amiga600, or an Amiga 600 clone if you like this way. Just as Chucky’s ReAmigas for other Amiga models. Primarily designed to replace old rotten boards – and to be honest, A600s are very affected by the leaking issue. 8 out of 10 boards suffering from it, and cca. 5 out of 10 should be scrapped and remade. Junior aimed this issue, and if I redid the board, I took the liberty to improve it. The features will be described later.
How it was made? Compatiblity? Reliability?
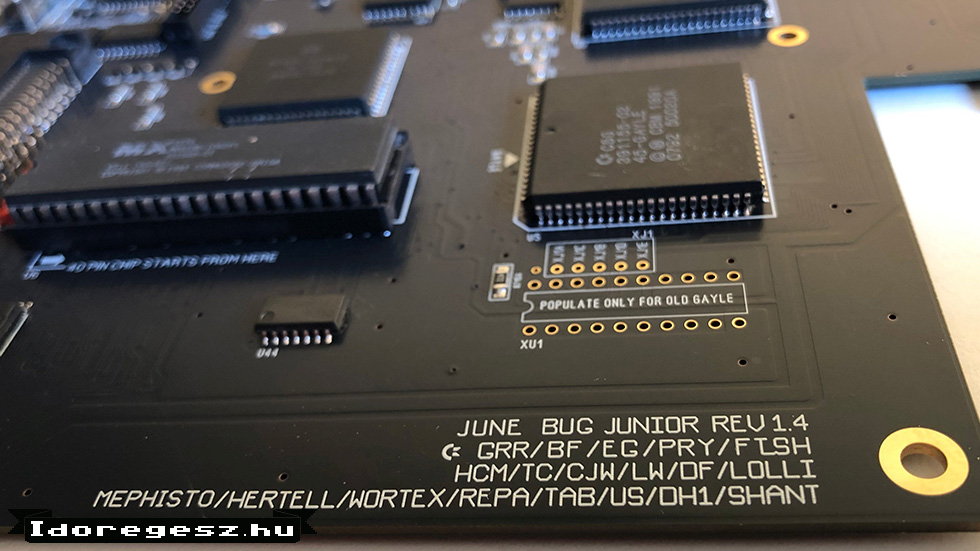
Junior based on the Commodore Rev 1.5. It works with every known A600 parts, including the 65Gayle chip, so you can use ANY revision donor to build it. I made the board to “backward compatible” to original setup. So you can omit the HDMI part and the Driveselector and build a conventional Amiga600. I kept the support for XU1 for old Gayles, HDD bay, CXA1145 encoder and RF modulator, even the NTSC one.Junior had four revision prior to V1.3.1, with 5 boards per revision. I improved and tested every version by one or two prototypes. All of them received 8-11hours of Burn-in and days/weeks of conventional “user test”: idling, performing various tasks in WB, run games, demos, and sort of things. When a given revision performed as we expected, I scrapped the prototype, and sold the remaining boards mainly for PCB moves. In summary, I worked with 11 prototypes until the rev1.3.1. So yes, reliable and well tested.
What are the improvements?
-
Corrected PCB layout, removed “nowhere” traces, made the overall tracing a bit nicer. I also made the main Vcc rails stronger a little bit, along with a few component’s Vcc input traces – sometimes they were undersized in the original board.
-
Very informative silkscreen. I aimed a comprehensible one to help builders. You can easily build it by silkscreen only, however, Chucky made a Locator to it.
-
Made possible of using THT capacitors for certain places, mainly to prevent strong leaking if one don’t have access to modern caps. All the footprints are SMT/THT mixed, so you can still use SMD caps everywhere. Depends on your decision.
-
DF0 SEL0 line filtering like on an A1200.
-
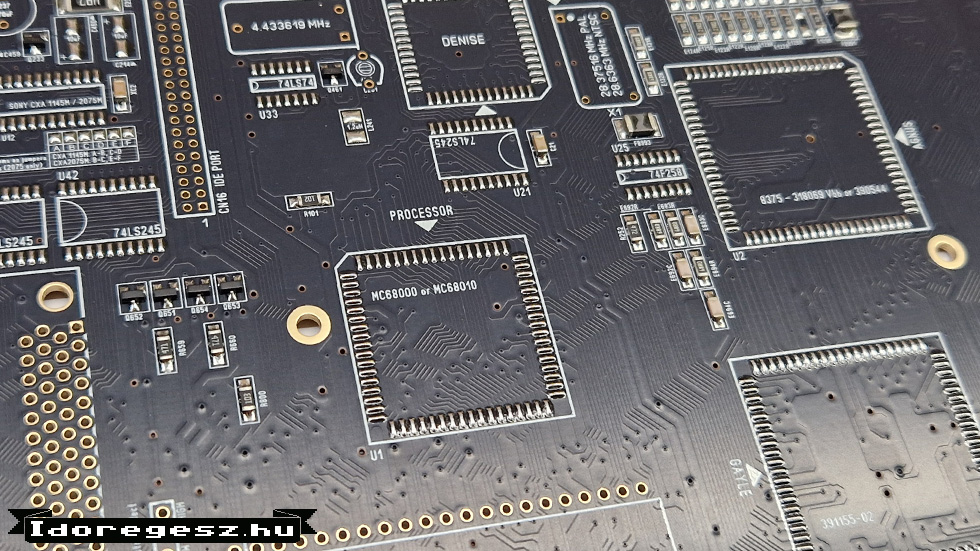
Values modified in audio (opamp) circuit, just like in an A1200, again. Junior sounds better than a Rev1.5.
-
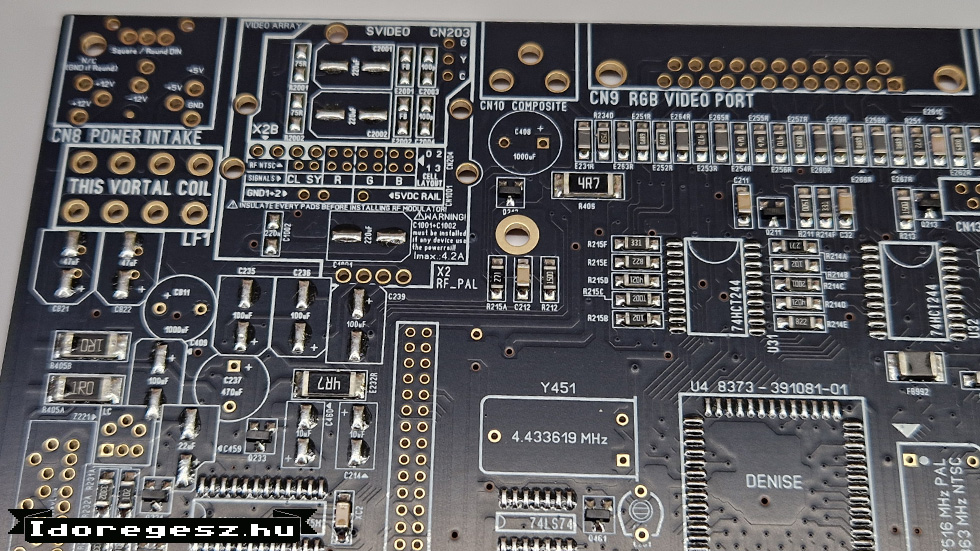
CXA2075M +CXA1145 encoder usage. Junior supports both, silkscreen has the instructions to what you omit/place onto board, depending on the encoder type, also has zeroohm jumpers to select between the two.
-
XC2 added onto board. This is the ugly big yellow capacitor which can be seen on many A600s at the top of the encoder. Don’t place it, as it is onboard now.
-
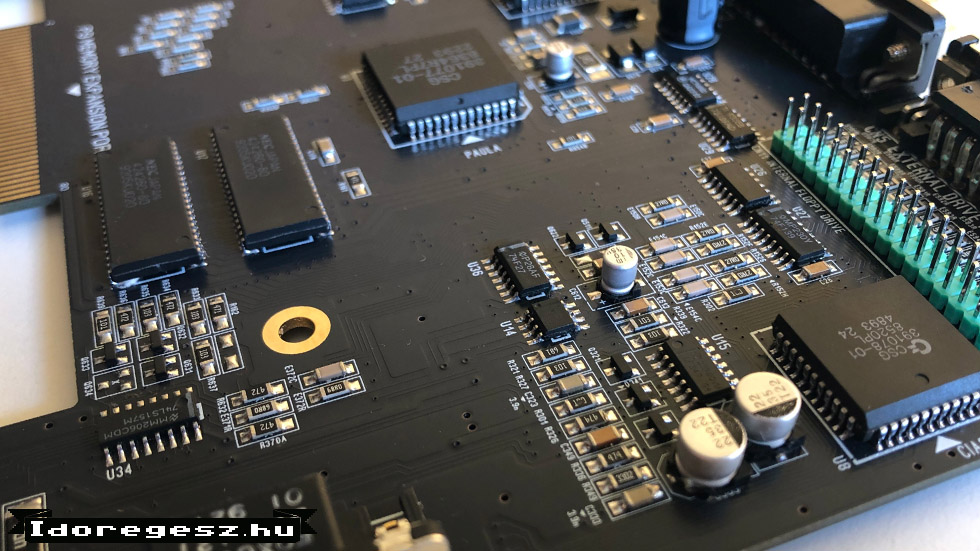
HDMI support. We have a standard 2.0mm pitch header to pick all the required signals to feed the RGB2HDMI adapter, this the RPi. We tested it with an adapter for A500 (quite big one) which does not give the most elegant look but also it is the most reliable compared to “corona” or reversePLCC solutions. Also, it carries the possibility of creating a Junior-specific adapter which can easily put onto the header.
-
S-Video support. I took the colution (partially) from the CD32. It gives a very nice, smooth picture. Although I designed it only when using CXA2075M, but to my surprise it gives a (slightly badder but still good) picture with 1145M. Though I recommend 2075 for Svideo.
-
Power Rail. I designed a strong power rail to feed atleast one big Rpi, maybe two smaller, like Zeros. It consists a very strong tracing between the Coil and the RPi power header. Though it was inspired to feed the HDMI RPi, you can use, however, to any purposes: feed PiStorm, coolers, whatever… it gives 5VDC, Imax 4.2A. Note that this power rail does not make your PSU stronger – you need a reliable and strong PSU if you intend to use these solutions.
-
Memory bank stretched apart to easy soldering. Now you can solder the SOJ RAMs even with a 4mm tip.
-
C16A and C16B moved to backside, also to made RAM soldering easy.
-
DriveSelector. Idea borrowed from the ReAmigas but it can handle all the 4 drives, DF0 to DF3. You can assign ANY DriveID to ANY physical drive. By default, traces are closed, if you intend to use it, you need to cut the traces and jumper the pins appropriately. if you don’t want it, just leave.
-
E131R and E132R moved away from Agnus, so you can solder Agnus without removeing (or not installing) them first.
-
R102 moved to backside. This is the “Vampore-resistor” which are the reasony why accelerator’s sockets needs to be grinded. You don’t have to grind anymore on a Jr. board.
-
Round DIN support. Also a ReAmiga feature, it works the same as on it.
-
HDD bay holes are now standard 3.0mm holes insted of the original oval. HDD cradles still can be used properly, but if not, you can also use them as mounting holes for accelerators. In this way, it is far more easy than on original boards.
- Optional Kickstart ROM switcher added, works the same way as of ReAmiga1200.
- Thermal vias added to big capacitors’ footprints to easier desolder.
- Facelifted silkscreen to easier build. Values corrected.
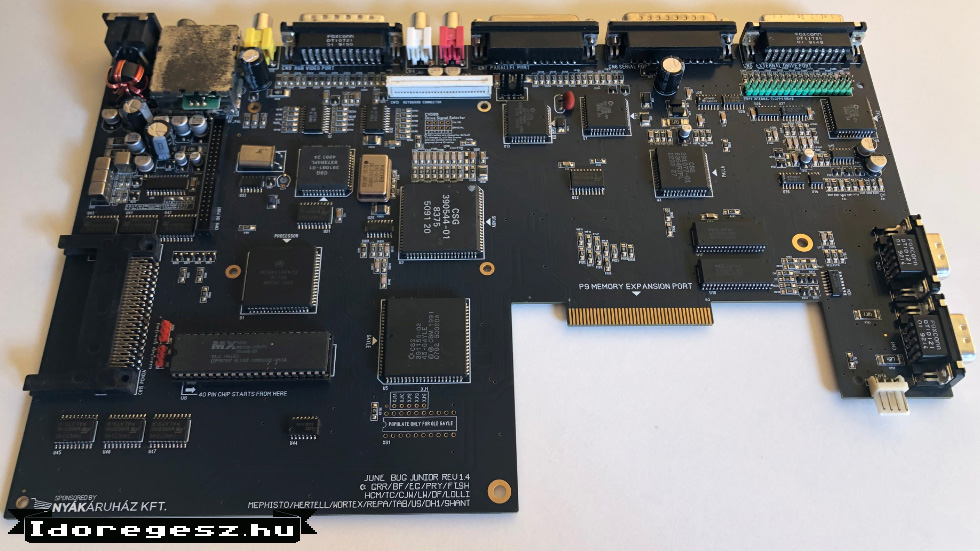
Pcb color is dark graphite semi-matte finish with ENIG (electro-less nickel with immersion gold). Very high quality pcbs!
This batch was fabricated with an open stencil thus all of its pads are pre-tinned. It allows you a very fast and simple way when building with heatgun or oven, otherwise please remove the tin from the required pads with solder wick if you build it in the conventional way with soldering iron.
Here is a build log from our happy customer, Pete: https://petemuckingabout.blogspot.com/2024/07/building-amiga-600-junior.html

Locator for the Junior pcb can be found >HERE< and >HERE< is the Mouser basket! The BOM (bill of materials) v1.3.1 can be found >HERE<!


